Contents
- 1 How to Identify Bad Pipes: A Pipe Quality Inspection Guide
- 1.1 Why Pipe Quality Matters
- 1.2 Types of Pipes and Common Substandard Issues
- 1.3 Step 1: Check the Pipe Material and Label
- 1.4 Step 2: Look for Physical Signs of Damage
- 1.5 Step 3: Verify Dimensions and Tolerances Measure the pipe’s outer diameter, inner diameter, and length.
- 1.6 Step 4: Test for Pressure Resistance
- 1.7 Step 5: Examine Fittings and Joints
- 1.8 Step 6: Review Certifications and Test Reports
- 1.9 Step 8: Ask the Right Questions Before Buying
- 1.10 Step 9: What to Do If You Find Substandard Pipes
- 1.11 Step 10: Prevent Future Problems with Proper Storage
- 1.12 Frequently Asked Questions
How to Identify Bad Pipes: A Pipe Quality Inspection Guide
Summary:
To identify bad pipes before installation, check material, markings, dimensions, pressure rating, and certifications. Look for cracks, corrosion, and poor joints. Use simple tools and ask for test reports. This quick pipe quality inspection guide helps you avoid substandard pipes and costly failures.
Why Pipe Quality Matters
Bad pipes cause leaks, floods, and expensive repairs.
A pipe that fails early can damage walls, floors, and personal items.
Even a small defect may lead to water loss over time.
Choosing quality pipes saves money and stress in the long run.
Understanding how to identify bad pipes protects your home and health.
Types of Pipes and Common Substandard Issues
Pipes come in many materials: copper, PVC, PEX, steel, and galvanized iron.
Each type has specific strengths and weaknesses.
Substandard pipes often use inferior alloys or thin walls.
Common problems include cracks, weak joints, and improper sizing. Some pipes are mislabeled or overrated for pressure.
Knowing the typical issues helps you spot them faster.
Typical Defects in Low‑Quality Pipes
- Thin walls that cannot hold pressure.
- Surface cracks that spread under stress.
- Corrosion spots on metal pipes.
- Rough interiors that restrict flow.
- Inconsistent color or texture indicating poor mixing.
Step 1: Check the Pipe Material and Label
Always inspect the pipe’s material before placement.
Look for a printed label that shows the manufacturer, material type, and pressure rating.
A reliable label includes standards such as ASTM, ISO, or local code compliance.
If the label is missing, faded, or handwritten, be suspicious. Ask the supplier for the material certification sheet.
Step 2: Look for Physical Signs of Damage
Examine each pipe for visible defects.
Scratches, dents, or dents can weaken the wall. Cracks, especially at bends, indicate a weak spot.
Rust spots on steel or corrosion on copper are red flags. Any discoloration may signal chemical deterioration.
Quick Visual Checklist
- Is the surface smooth and even?
- Are there any dents or scratches?
- Does the pipe have rust or corrosion? – Are there cracks at joints or bends?
If you answer “yes” to any of these, consider rejecting the pipe.
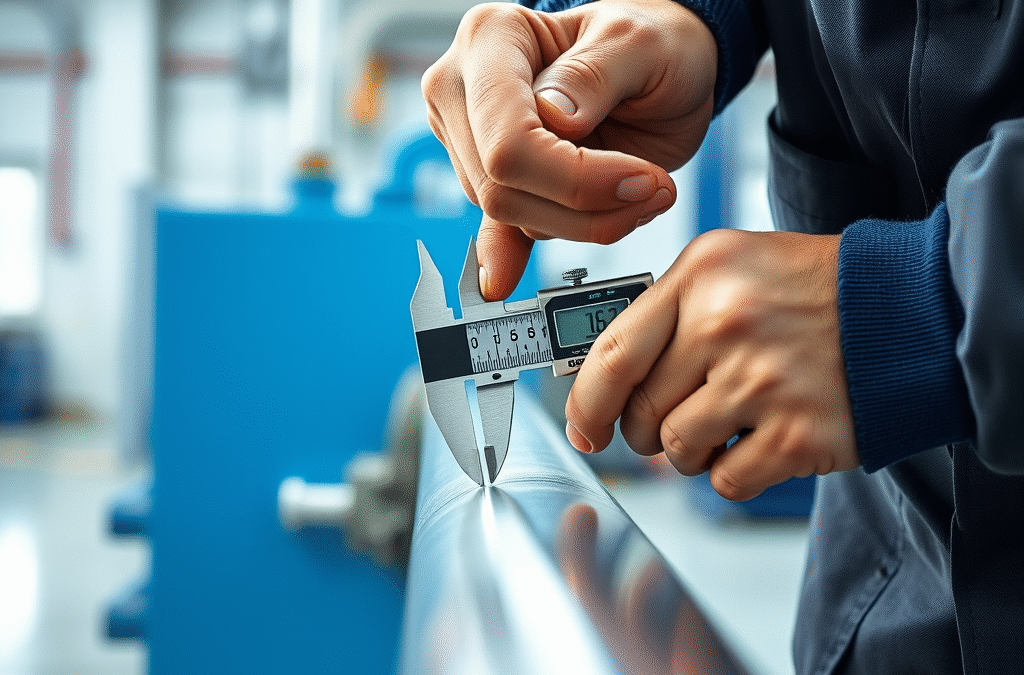
Step 3: Verify Dimensions and Tolerances Measure the pipe’s outer diameter, inner diameter, and length.
Compare the measurements with the specifications on the label.
Most standards allow a small tolerance, usually 1‑2 mm for diameter.
If the pipe is significantly thinner or shorter, it may be substandard.
Use a caliper or ruler for accurate measurement.
Step 4: Test for Pressure Resistance
A simple pressure test can reveal hidden weaknesses.
Connect the pipe to a low‑pressure water source. Gradually increase pressure while watching for drops.
A sudden pressure drop indicates a leak.
Even tiny leaks suggest a compromised wall.
Pressure Test Procedure
Step 5: Examine Fittings and Joints
Fittings must match the pipe material and size.
Inspect each fitting for cracks, corrosion, or improper threading.
A poor fit can cause leaks even with a perfect pipe.
Check that the joint is tight and evenly seated. If the fitting feels loose, replace it before installation.
Step 6: Review Certifications and Test Reports
Reputable manufacturers provide test reports.
Look for certifications such as NSF, CSA, or local building code approvals.
The report should include material composition, pressure rating, and durability tests. If the seller cannot show a test report, ask for it or choose another supplier.
Key Certifications to Look For
- NSF/ANSI 61 – Drinking water safety.
- ISO 9001 – Quality management system.
- ASTM D1785 – Standard for PVC pressure pipes.
- EN 12201 – Standard for steel pipes. ## Step 7: Use Simple Tools for Inspection
A flashlight helps spot cracks and corrosion inside.
A magnet can identify ferrous metal pipes.
A pipe cutter or hacksaw can reveal wall thickness. A pressure gauge is essential for pressure testing.
Simple tools give you immediate feedback without complex equipment.
Tool Kit Basics – Flashlight or headlamp. – Caliper or ruler.
- Pressure gauge with hose.
- Magnet (for metal detection).
- Pipe cutter or saw.
Step 8: Ask the Right Questions Before Buying
Before purchasing, ask the seller about the pipe’s origin.
Request the material batch number and test certificates.
Inquire about the manufacturing process— extrusion, welding, or casting?
Ask if the pipe has been inspected for common defects.
Check the return policy in case a defect is discovered later.
Step 9: What to Do If You Find Substandard Pipes
If a pipe fails any of the checks, set it aside.
Do not install it in your system.
Contact the supplier for a replacement or refund.
Document the defect with photos and notes.
Report the issue to the relevant consumer protection agency if needed.
Step 10: Prevent Future Problems with Proper Storage
Store pipes on a raised platform to avoid moisture damage.
Keep them away from direct sunlight and extreme temperatures.
Stack pipes horizontally with support at each end.
Cover the ends with caps to prevent debris entry.
Proper storage maintains pipe integrity until installation.
Frequently Asked Questions
What is the easiest way to spot a bad pipe?
Look for visible cracks, rust, or a missing label. Any of these signs mean the pipe may be substandard.
How can I test pipe pressure without special equipment?
Use a simple hand pump and a pressure gauge. Slowly increase pressure and watch for drops.
Do all pipes need a certification?
Not legally, but certified pipes have proven testing and meet safety standards.
Can I use a magnet to check pipe material? Yes. Magnets stick to steel and iron pipes but not to copper or PVC.
What tolerance is acceptable for pipe dimensions?
Most standards allow a ±1‑2 mm tolerance for diameter and length.
Is visual inspection enough?
Visual checks catch many defects, but a pressure test adds extra safety.
How often should I inspect stored pipes?
Inspect them before each project or at least once every six months.
Can substandard pipes be repaired?
Minor surface scratches can be sanded, but internal cracks cannot be repaired safely.
What should I do if a supplier refuses a return?
Document the defect, share evidence online, and consider legal small‑claims action.
Are there visual codes for pipe markings?
Look for standard symbols such as “ASTM,” “NSF,” or “ISO” printed on the pipe.
How do I know if a pipe’s pressure rating is accurate? Check the rating against the manufacturer’s test report and compare with local code requirements.
—
By following this pipe quality inspection guide, you can confidently identify bad pipes before installation. The steps are simple, practical, and suited for beginners. Use the checklist, ask the right questions, and protect your project from avoidable failures.